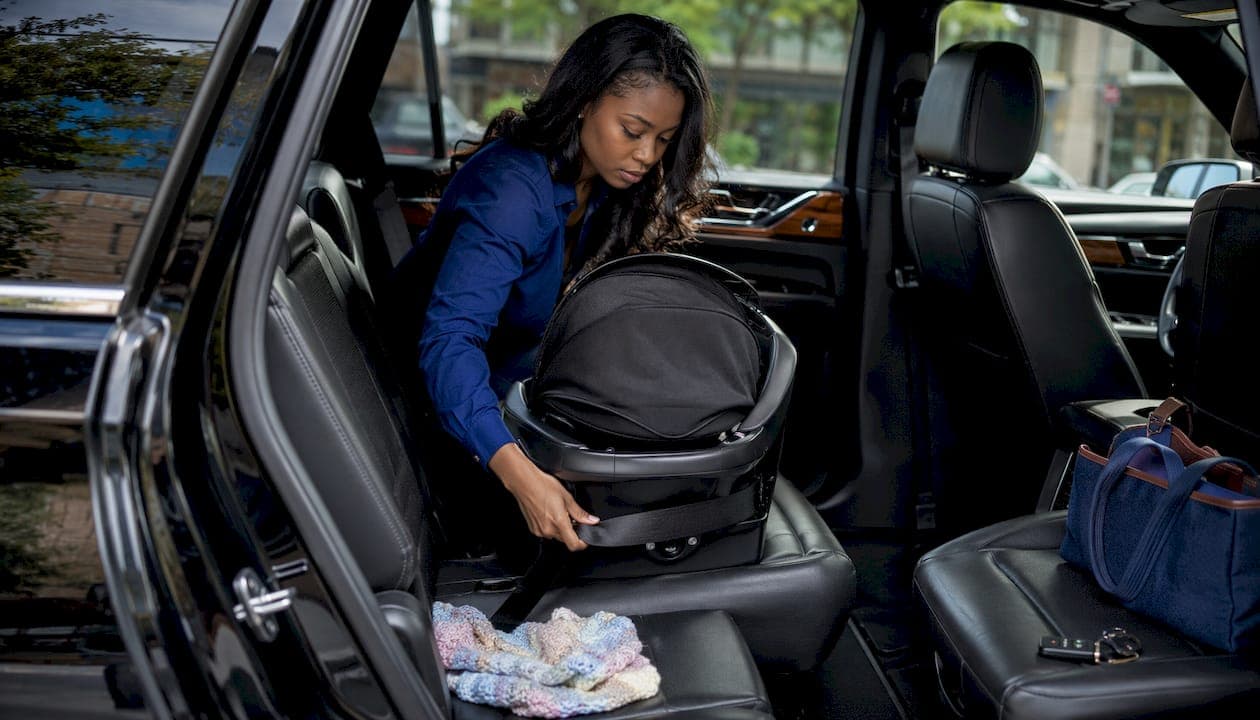
You can securely install a child car seat in a luxury SUV by following both the car seat and vehicle owner manuals, choosing either LATCH or the seat belt (not both unless both manuals explicitly permit it), and confirming the install passes the 1-inch movement test. That single fit check is a clear signal a seat is properly secured.
Quick BLUF checklist for luxury SUV owners:
- Read both the vehicle owner manual and the car seat manual before touching an anchor
- Remove aftermarket cushion extenders, seat wedges, or leg supports that obstruct the base
- Choose a rear outboard or center position in the second row when possible
- Select LATCH or seat belt as your primary attachment method, never both simultaneously
- For forward-facing seats, always attach the top tether to a verified structural anchor
- Mount any support leg directly to the vehicle floor, not on raised trim or storage compartments
- Pull firmly at the belt path and confirm the seat does not move more than 1 inch (2.5 cm) in any direction
Pro Tip: Before placing the car seat, remove any cushion extenders and check for ventilation grilles or heated-seat wiring beneath the seat surface. Protecting those electronics from day one prevents costly repairs later.
Table of Contents
- What you need to check before installing a child seat in a luxury SUV
- How to choose between LATCH and the seat belt in a luxury SUV
- How to install a rear-facing car seat in an SUV: step-by-step
- How to install a forward-facing car seat with a top tether in a luxury SUV
- Common fit problems in luxury SUVs and how to solve them
- Post-install checks that protect your child and your interior
- When should you call a Certified Child Passenger Safety Technician?
- Your printable luxury SUV car seat install checklist
- Key Takeaways
- Why correct child-seat installs matter to Autovendorsfl
- Authoritative sources and where to learn more
What you need to check before installing a child seat in a luxury SUV
Preparation separates a safe install from one that looks correct but fails under load. Start by reading both manuals cover to cover, then physically locate the LATCH lower anchors and top tether anchor in your specific vehicle. Anchor positions vary by model: some SUVs place the top tether on the seatback, others on the ceiling or cargo floor.
Key preparation steps:
- Identify LATCH lower anchor locations in the seat bight and confirm the weight limit (many vehicles, including the Infiniti QX60 and QX80, cap combined child-plus-seat weight at 65 lbs for lower anchor use)
- Locate the top tether anchor point per the owner manual; top tether anchors are required in all U.S. vehicles manufactured since September 2000
- Slide the vehicle seat to its rearmost position and raise the headrest if it blocks the car seat's back
- Clear any cargo or loose objects near where a support leg would contact the floor
- Check for power-fold or slide mechanisms that a car seat base could disable long-term
Luxury SUVs add a layer of complexity. Deep-set LATCH anchors in leather seat bights are common, and ventilation or heating components beneath the seat covering can be damaged by a rigid base. Long-term child seat use may cause wear to upholstery and seat electronics, so manufacturers recommend protective accessories such as seat-back protector mats where compatible with both manuals.
Pro Tip: Confirm that any protective mat you use is approved by both the vehicle manufacturer and the car seat manufacturer. An unapproved mat can raise the seat base, change the recline angle, and compromise anchor engagement.
How to choose between LATCH and the seat belt in a luxury SUV
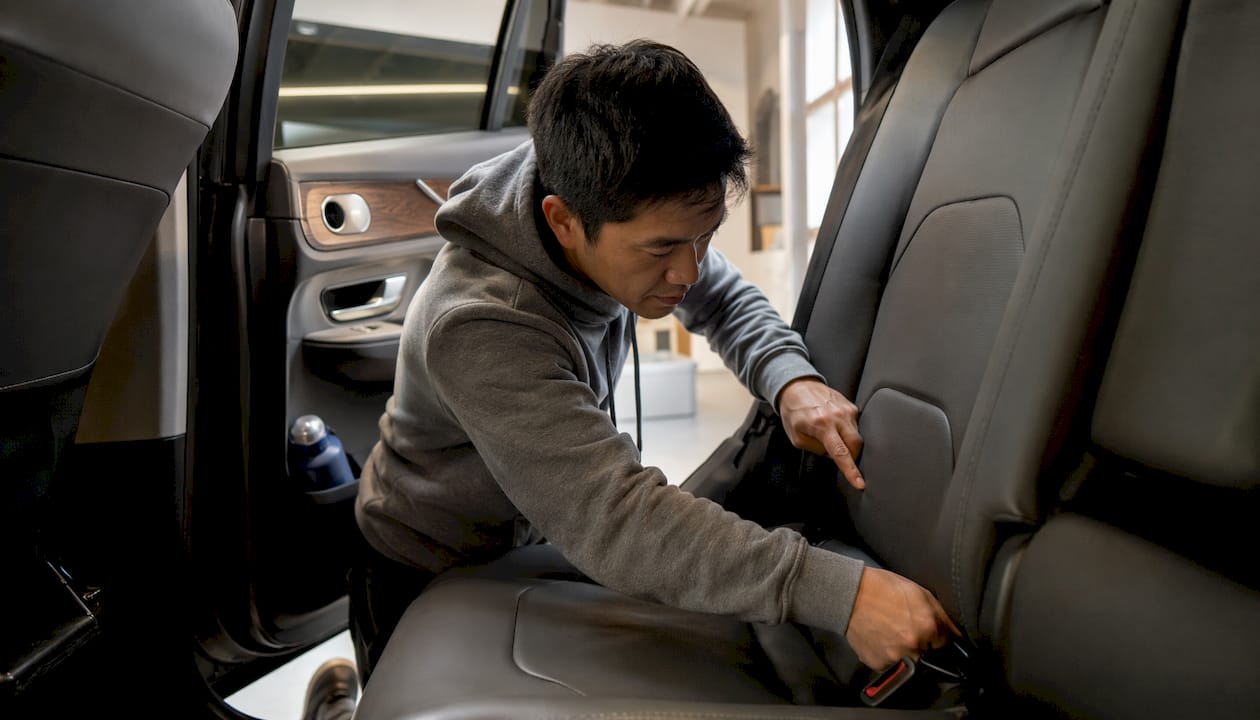
Use whichever method both the car seat and vehicle manuals allow. For most second-row installs, LATCH is straightforward when the combined weight of the child and seat stays below the vehicle's lower-anchor limit. Once that limit is exceeded, switch to the seat belt.
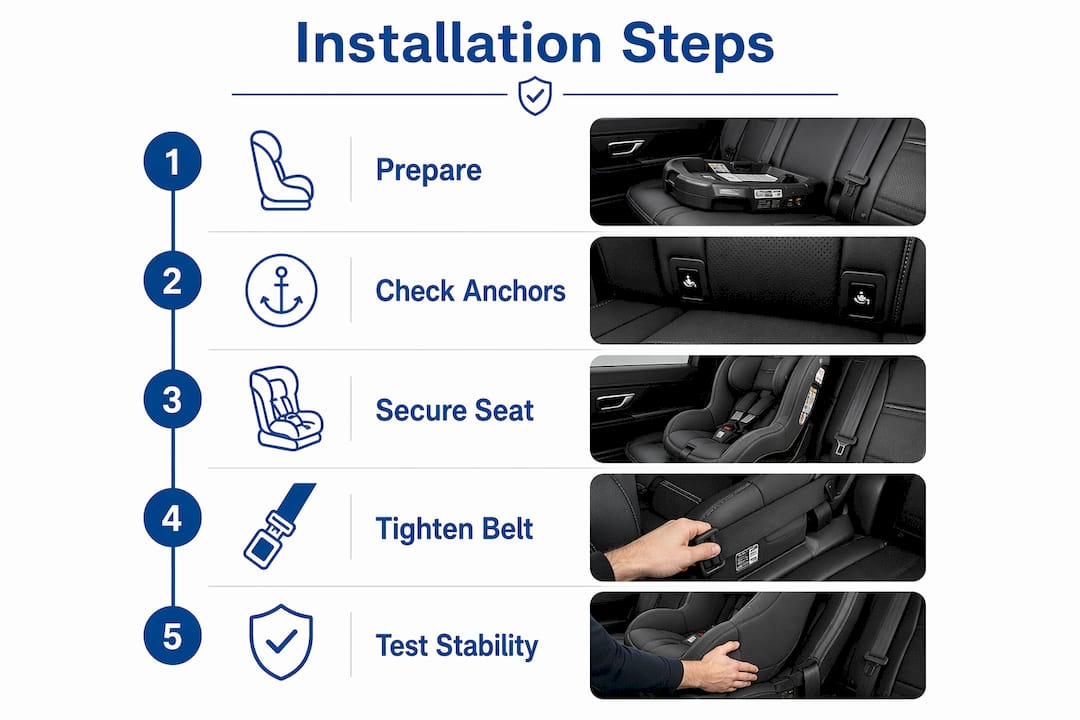
The rule is clear: do not use LATCH and the seat belt simultaneously unless both manufacturers explicitly permit combined use. Doing so can change how the seat performs in a crash.
Practical considerations for luxury SUVs:
- Recessed anchors in leather bights can be difficult to engage cleanly; have a second person compress the cushion while you attach the connectors
- If anchors are unusually deep or the leather resists compression, the seat belt route is often a stronger, more accessible option
- Center-seat positions in many SUVs lack lower anchors entirely; the seat belt is the correct method there
- Always verify the seat belt engages the Automatic Locking Retractor (ALR) mode before tightening
Pro Tip: If you're struggling to feel the LATCH connector click into place through thick leather, try pressing the cushion down firmly with your knee before inserting the connector. A clean, audible click confirms engagement.
How to install a rear-facing car seat in an SUV: step-by-step
Set the vehicle seat to its rearmost position and confirm the recline indicator on the car seat before tightening anything. Tilted or reclined vehicle seats affect the recline angle of a rear-facing seat, so getting the base position right first saves rework.
- Place the car seat in the rear-facing position in the back seat
- Attach LATCH connectors to both lower anchors (straps untwisted), or thread the seat belt through the rear-facing belt path and buckle it
- If using the seat belt, pull the shoulder belt fully out to engage ALR mode, then allow it to retract
- Press down firmly on the seat with your knee while tightening the LATCH straps or pulling up on the seat belt to remove all slack
- Confirm the recline angle using the car seat's built-in indicator
- Perform the fit test: grip the seat at the belt path and pull firmly side-to-side and front-to-back
A properly installed seat must not move more than 1 inch (2.5 cm) in any direction at the belt path. If it does, tighten further or try a different seating position.
Pro Tip: Deep bolsters on luxury SUV seats can create a gap between the car seat base and the vehicle seatback. Press the base firmly into the bight while tightening to close that gap before the final fit test.
How to install a forward-facing car seat with a top tether in a luxury SUV
Always use the top tether for forward-facing installs. Tethers are required in U.S. vehicles made since September 2000 and measurably reduce forward head excursion in a crash.
- Place the car seat in the forward-facing position, back flush against the vehicle seatback
- Adjust or remove the headrest if it prevents a flush fit; store it securely
- Attach LATCH connectors to both lower anchors, or thread the seat belt through the forward-facing belt path and engage ALR mode
- Press down and rearward with your knee while tightening straps or the seat belt to remove slack
- Route the top tether strap over or through the seatback (per the owner manual) and clip it to the verified tether anchor
- Tighten the tether until no slack remains; the strap should be taut but not pulling the seat off the vehicle seatback
- If a support leg is used, extend it until it contacts the vehicle floor firmly, not raised trim or a storage compartment
Post-attach checklist:
- Harness slots at or above the child's shoulders for forward-facing
- Chest clip positioned at armpit level
- Harness passes the pinch test (no extra webbing between fingers at the shoulder)
- Tether strap untwisted and routed per the owner manual
Pro Tip: In SUVs where the tether anchor sits high on the seatback or in the ceiling, verify the anchor is structural in the owner manual before clipping. Cargo hooks and decorative trim loops look similar but are not rated for tether loads.
Common fit problems in luxury SUVs and how to solve them
Wide bolsters, recessed anchors, and unusual tether locations are the three issues that catch most luxury-SUV owners off guard. Third-row seats add another layer: some SUVs lack tether anchors in the third row entirely, and a car seat base can block power-fold mechanisms, limiting access to the rearmost row.
Practical solutions:
- Wide bolsters preventing a flush fit: try the center position or a slimmer-profile seat; the seat belt method often works better than LATCH in wide outboard positions
- Recessed LATCH anchors: compress the leather cushion with a second person's help; use a compatible seat mat only if both manuals allow it
- Third-row installs: measure clearances carefully, confirm tether anchor availability in the manual, and note that power-fold functions may be disabled with a seat installed
- Ceiling or cargo-floor tether anchors: follow the owner manual's routing diagram exactly; never clip to plastic trim, cargo hooks, or seat rails
Pro Tip: For three-across installs in a second row, slim-profile seats designed for tight fits can make the difference between a safe install and one that won't pass the movement test.
Post-install checks that protect your child and your interior
Perform the movement check at the belt path after every install and after any adjustment to the vehicle seat position. That check takes seconds and catches the most common installation error: a seat that looked tight but wasn't.
Ongoing verification checklist:
- Seat moves no more than 1 inch (2.5 cm) at the belt path in any direction
- Harness snug (pinch test at the shoulder confirms no extra slack)
- Chest clip at armpit level
- Top tether taut and untwisted, routed to a verified structural anchor
- Recline indicator within the car seat's specified range
- Support leg (if used) contacting the vehicle floor with no gap
Recheck after the first few drives, after any vehicle seat adjustment, and whenever the car seat is removed and reinstalled. Periodic checks take 5–10 minutes and are worth logging so you remember any configuration changes. For interior protection, use only manufacturer-approved seat mats and avoid placing any part of the car seat base over active ventilation outlets.
When should you call a Certified Child Passenger Safety Technician?
Call a CPST when you're uncertain about anchor integrity, dealing with a third-row install, or working around power-fold mechanisms and unusual tether locations. Safe Kids Worldwide recommends a CPST inspection whenever an install feels uncertain, regardless of how experienced the parent is.
What to expect from a CPST session:
- The technician inspects the full install, confirms anchor engagement, and demonstrates correct harnessing
- Sessions typically run 30–60 minutes
- Many community events and hospital programs offer free inspections; private appointments may carry a modest fee
- CPSTs familiar with luxury interiors can advise on protective accessories and model-specific anchor quirks
Finding a technician: Safe Kids Worldwide and HealthyChildren.org both maintain CPST directories. Local hospitals, fire stations, and community health programs are also reliable starting points. For buyers of premium SUVs, a dealership with family-vehicle expertise can often refer you to a certified fitting station that understands luxury interiors.
Pro Tip: Book a CPST appointment before the baby arrives, not after. Scheduling in advance means you're not rushing through an install under pressure.
Your printable luxury SUV car seat install checklist
Use this checklist at the vehicle during the initial install and again after the first drive.
- Read both the vehicle owner manual and car seat manual
- Remove obstructive cushions, extenders, and leg supports
- Identify and confirm LATCH lower anchor locations and weight limit
- Choose LATCH or seat belt (not both unless both manuals permit)
- Attach and tighten; press down with knee to remove all slack
- Secure top tether to verified structural anchor (forward-facing)
- Mount support leg to vehicle floor only, not raised trim
- Perform 1-inch fit test at the belt path: the seat should not move more than 1 inch (2.5 cm) in any direction.
- Confirm harness height, tightness (pinch test), and chest clip position
- Schedule a CPST inspection if any step felt uncertain
For a broader look at what to verify before purchasing a family-oriented luxury SUV, the used SUV buying checklist for families covers compatibility considerations worth reviewing before you commit to a model.
Key Takeaways
A correct child-seat install in a luxury SUV requires following both manuals, passing the 1-inch belt-path movement test, and using the top tether on every forward-facing install.
| Point | Details |
|---|---|
| Follow both manuals | The car seat manual and vehicle owner manual together govern every attachment decision. |
| Pass the 1-inch fit test | The seat must not move more than 1 inch (2.5 cm) at the belt path in any direction. |
| Use the top tether forward-facing | Tether anchors are required in U.S. vehicles since September 2000; always attach and tighten. |
| Support leg to floor only | Mount support legs directly to the vehicle floor, never on raised trim or storage compartments. |
| Call a CPST when uncertain | A Certified Child Passenger Safety Technician can verify complex installs in 30–60 minutes. |
Why correct child-seat installs matter to Autovendorsfl
Most installation guides treat the car seat as an afterthought. At Autovendorsfl, it's part of how we think about vehicle readiness for family buyers. A luxury SUV with recessed LATCH anchors, power-fold third-row seats, and heated leather upholstery presents real installation challenges that a generic checklist won't address. Knowing those challenges before you buy is as important as knowing the horsepower figure.
The honest reality is that many premium SUV owners complete an install that looks right but fails the 1-inch movement test. The seat feels solid, the leather looks undamaged, and the tether strap appears taut. But without confirming the anchor is structural and the belt path is correct, the install may not perform as designed in a crash. That gap between appearance and verified safety is exactly where a CPST earns their time.
Autovendorsfl specializes in luxury vehicles and offers personalized guidance to buyers navigating these decisions. Whether you need help identifying which models offer the most accessible LATCH anchors, want a referral to a certified fitting station, or are still selecting the right vehicle for your family, the team can assist. Buyers working with a personal car buying service often find that model-specific fit questions get answered before the purchase, not after.
Authoritative sources and where to learn more
The following resources back the guidance in this article and are worth bookmarking for future installs or checks.
- NHTSA (National Highway Traffic Safety Administration): step-by-step rear- and forward-facing installation instructions, recline angle guidance, and harness fit checks at nhtsa.gov
- Safe Kids Worldwide: fit test standards, CPST directory, and installation principles at safekids.org
- HealthyChildren.org (American Academy of Pediatrics): top tether importance, legal history of U.S. tether requirements, and age/weight guidance
- Vehicle owner manual: the definitive source for your specific model's anchor locations, weight limits, and accessory compatibility; confirm top tether anchor position and any ceiling or floor routing instructions
- Car seat manual: governs belt path routing, recline angle range, harness height, and whether combined LATCH-plus-seat-belt use is permitted
- CPST directories: Safe Kids Worldwide and HealthyChildren.org both maintain searchable technician directories by ZIP code
For model-specific anchor locations and trim considerations, the pre-owned luxury car inspection checklist from Autovendorsfl covers seat anchor condition and electronic-seat health as part of a full vehicle review.
This article provides general information for educational purposes. Confirm current installation requirements with your vehicle and car seat manuals, and consult a Certified Child Passenger Safety Technician for guidance specific to your vehicle and child's needs.